Showing posts with label tutorial. Show all posts

Thursday, July 26, 2012

Glowing Embers Tutorial/FOTD

I know, I know, the title is interesting, to say the least. But it's the best my friend and I could come up with. All name credit goes to my friend Mia, thank you! This morning, I decided to do a look with my Inglot eyeshadows. Inglot is probably my favorite makeup brand of all time - they have such consistent products at a fantastic price! Anyway, their eyeshadows are just fantastic in terms of texture, color, wear, and everything else you could think of. You guys have probably heard me rave about Inglot eyeshadows countess times on this blog, so I'll stop now. Anyway, I felt that my Inglot eyeshadows hadn't gotten enough love recently, so I used all Inglot eyeshadows this time around. Here's the look, and then I'll do a tutorial on it! My pictures didn't come out as well as I liked, sorry about that. =/


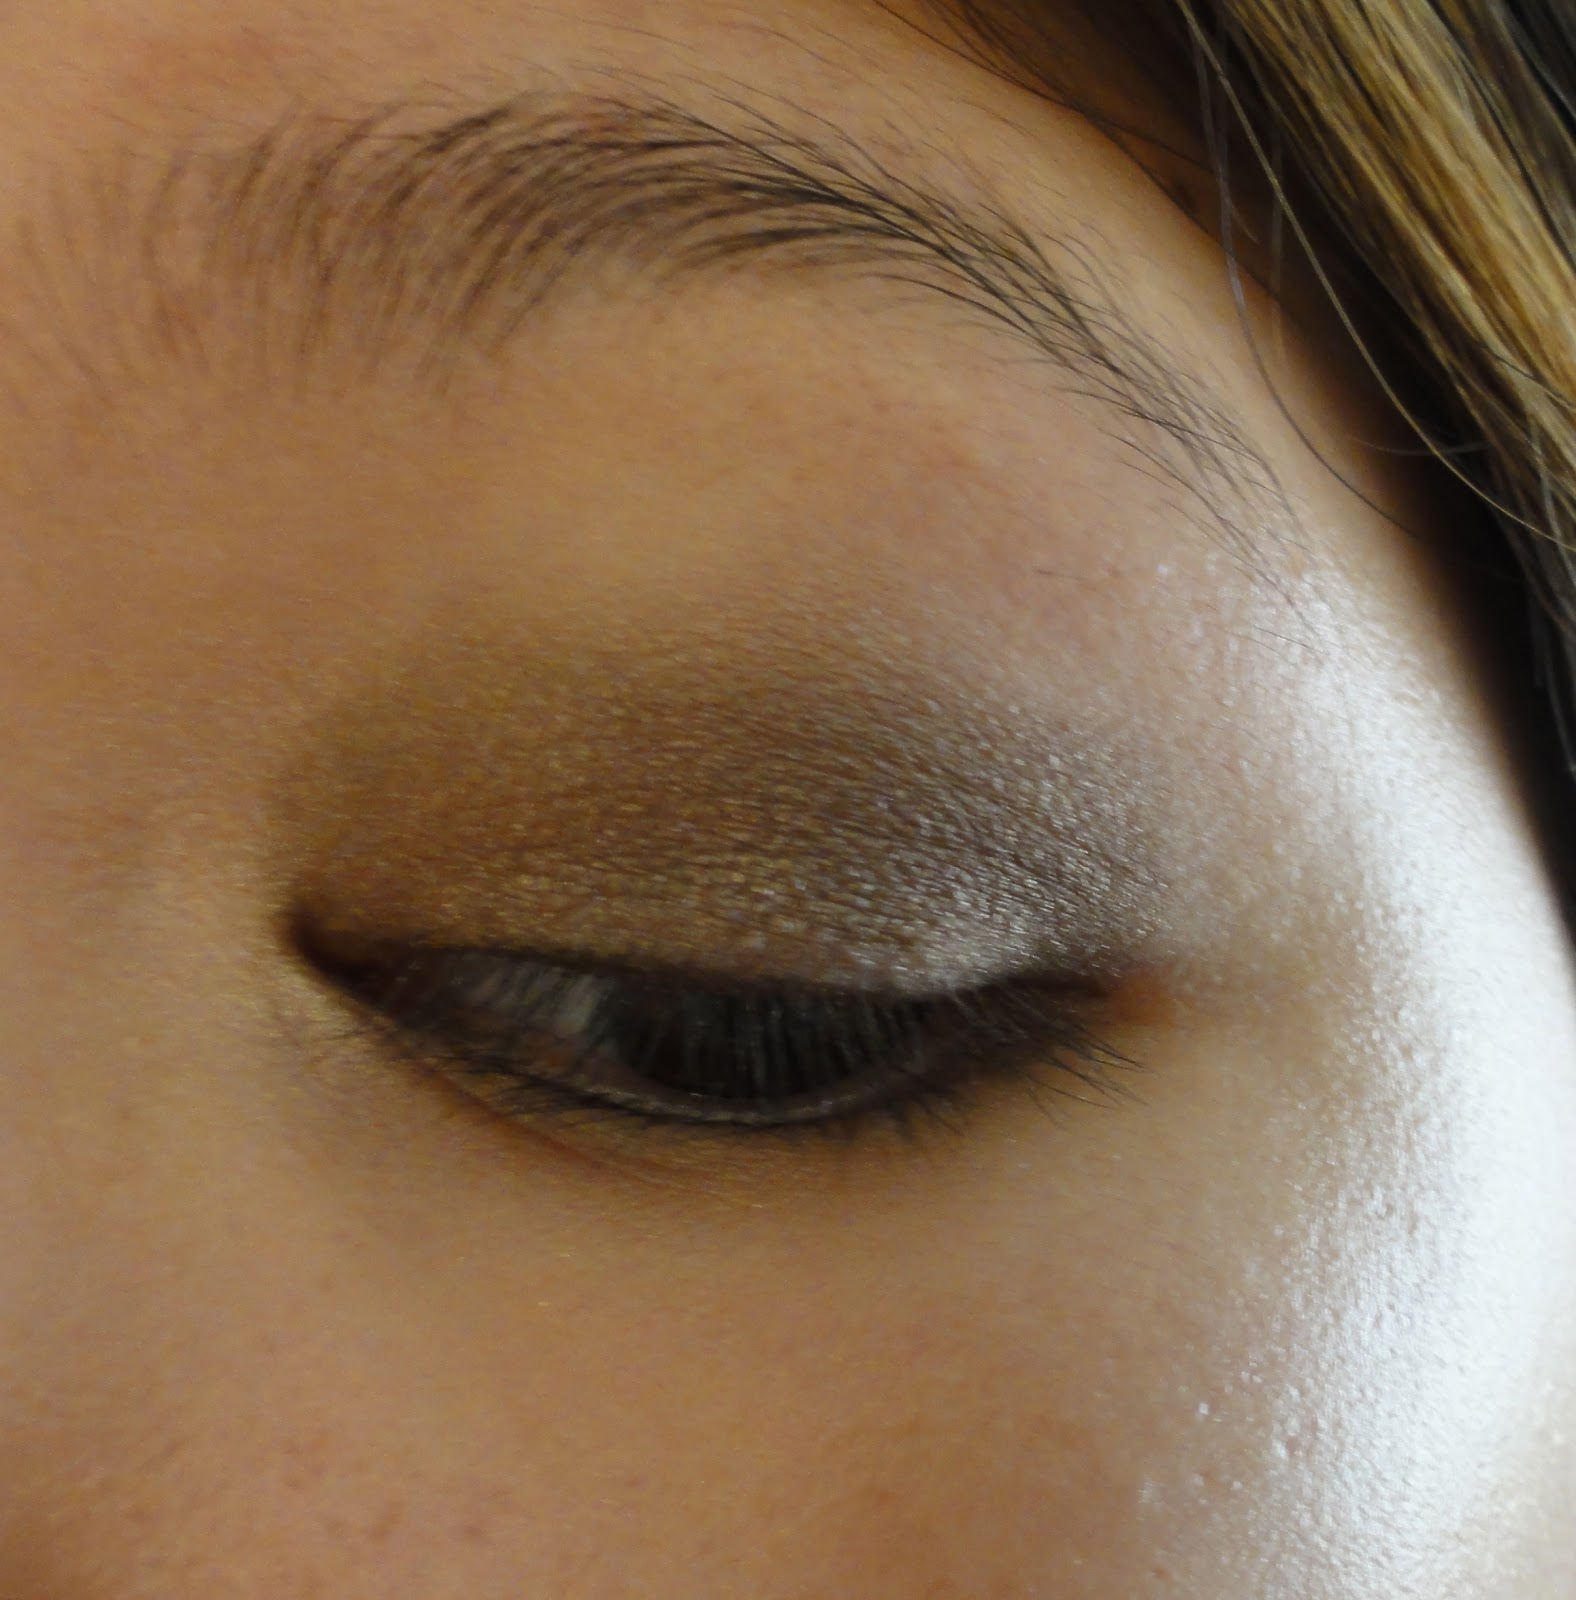
This look has pale golds, burgundy brown, and copper, although it doesn't show super well in the pictures. It's a really gorgeous look in real life! Here's pictures and swatches of the eyeshadows I used, so that you guys can find dupes in your collection.

Clockwise from bottom: Inglot Pearl 423, Inglot Pearl 405, Inglot AMC Shine 27

From top to bottom: Inglot AMC Shine 27, Inglot Pearl 405, Inglot Pearl 423

Hopefully you guys will have similar colors in your makeup collections! Anyway, here goes the tutorial:
1. Place Inglot AMC Shine 27 (a cool toned shimmery gold, I can't think of any dupes right now) over the inner 2/3 of your lid
2. Using a small shader brush, place Inglot Pearl 405 (a true copper, dupes could be MAC Amber Lights, credit to Temptalia, or Stila Copper) in the very center of your lid, making sure the color is visible.
3. Using that same small shader brush, place Inglot Pearl 423 (a brown with hints of burgundy, dupe could be Urban Decay Hustle) on the outer 1/3 of your lid.
4. Blend out all the colors
5. Add eyeliner if you wish, and mascara.

Here's a complete FOTD product list.

Eyes
-Urban Decay Primer Potion
-Inglot AMC Shine 27
-Inglot Pearl 405
-Inglot Pearl 423
-Fairydrops Scandal Queen Mascara
-YBF Automatic Universal Taupe Eyebrow Pencil

Face
-Pur Minerals 4 in 1 Powder Foundation
-Make Up Forever Full Cover Concealer in 7
-theBalm Hot Mama Blush
-theBalm Sexy Mama Powder

Lips
-YSL Rouge Pur Couture Vernis a Levres Glossy Stain in 15 Rose Vinyl

Hope you guys enjoyed the tutorial, I want to start doing more FOTD/tutorial type things in the future. I think they're a lot of fun! Next time I'll take step by step pictures so it's easier to follow and hopefully come up with a name that's not quite as cheesy (not that I'm bashing the name)! Hope you guys are all having a good day!

Saturday, February 4, 2012

Urban Decay Naked2 Palette Tutorial

This is an more intense version of an everyday look. I promised you all tutorials, and here's my first one! I apologize for my unkempt brows and semi-icky skin in these pictures - I hadn't applied any face stuff yet, I always do my eye makeup first so if there's any fallout (which there was from these shadows, for some reason my UD Naked2 shadows have a noticeable amount of fallout - that's pretty much my only issue with this palette. =/ Anyway, here's my tutorial, I hope you enjoy!


1. Prime your eyes with an eyeshadow primer (I used UDPP)

2. Place the color Busted (a deep shimmery brown with hints of taupe, dupes could be the bottommost left shade in the Wet N Wild Comfort Zone palette or just any dark brown eyeshadow) allover your lid, but don't place any color above your crease. Use a blending brush to feather out any harsh lines if you want, I prefer to blend all at the end but it's up to you.

3. Place Pistol (a shimmery greyish silver that leans taupe with a hint of brown, a similar color would be Inglot 444, that's the only one I can think of at the moment) in the middle 1/3 of your lid.

4. Place Suspect (a shimmery light champagne brown, NYX Iced Mocha is a dupe) in the inner 1/3 of your lid, but NOT on the inner corner. 

5. Place Snakebite (a dark shimmery brown that leans a bit gold, I actually couldn't find any dupes of this but any deep brown with gold undertones will do) in the outer 1/3 of your lid. Blend all 3 shades together, blending outwards.

6. Place Bootycall (shimmery whiteish beige color, dupes would be MAC Naked Lunch, Wet N Wild's highlight shade in the Walking on Eggshells palette) in the inner corner to brighten up your eyes. 


7. Curl your eyelashes and add mascara (I used Fairydrops Scandal Queen).

8. And you're done (I added blush, foundation, concealer, lipgloss, etc. in this last photo)!


I hope you enjoyed this tutorial, and thanks for reading! Comments/questions are always welcome! :)

Related Posts Plugin for WordPress, Blogger...